Monday, May 9, 2022

triple trumpet case

This is a non-stringed instrument project I got asked to do several years ago. 
Right after that, I started working on pianos and then bought a house, so this project got put on a far back burner until now.
 
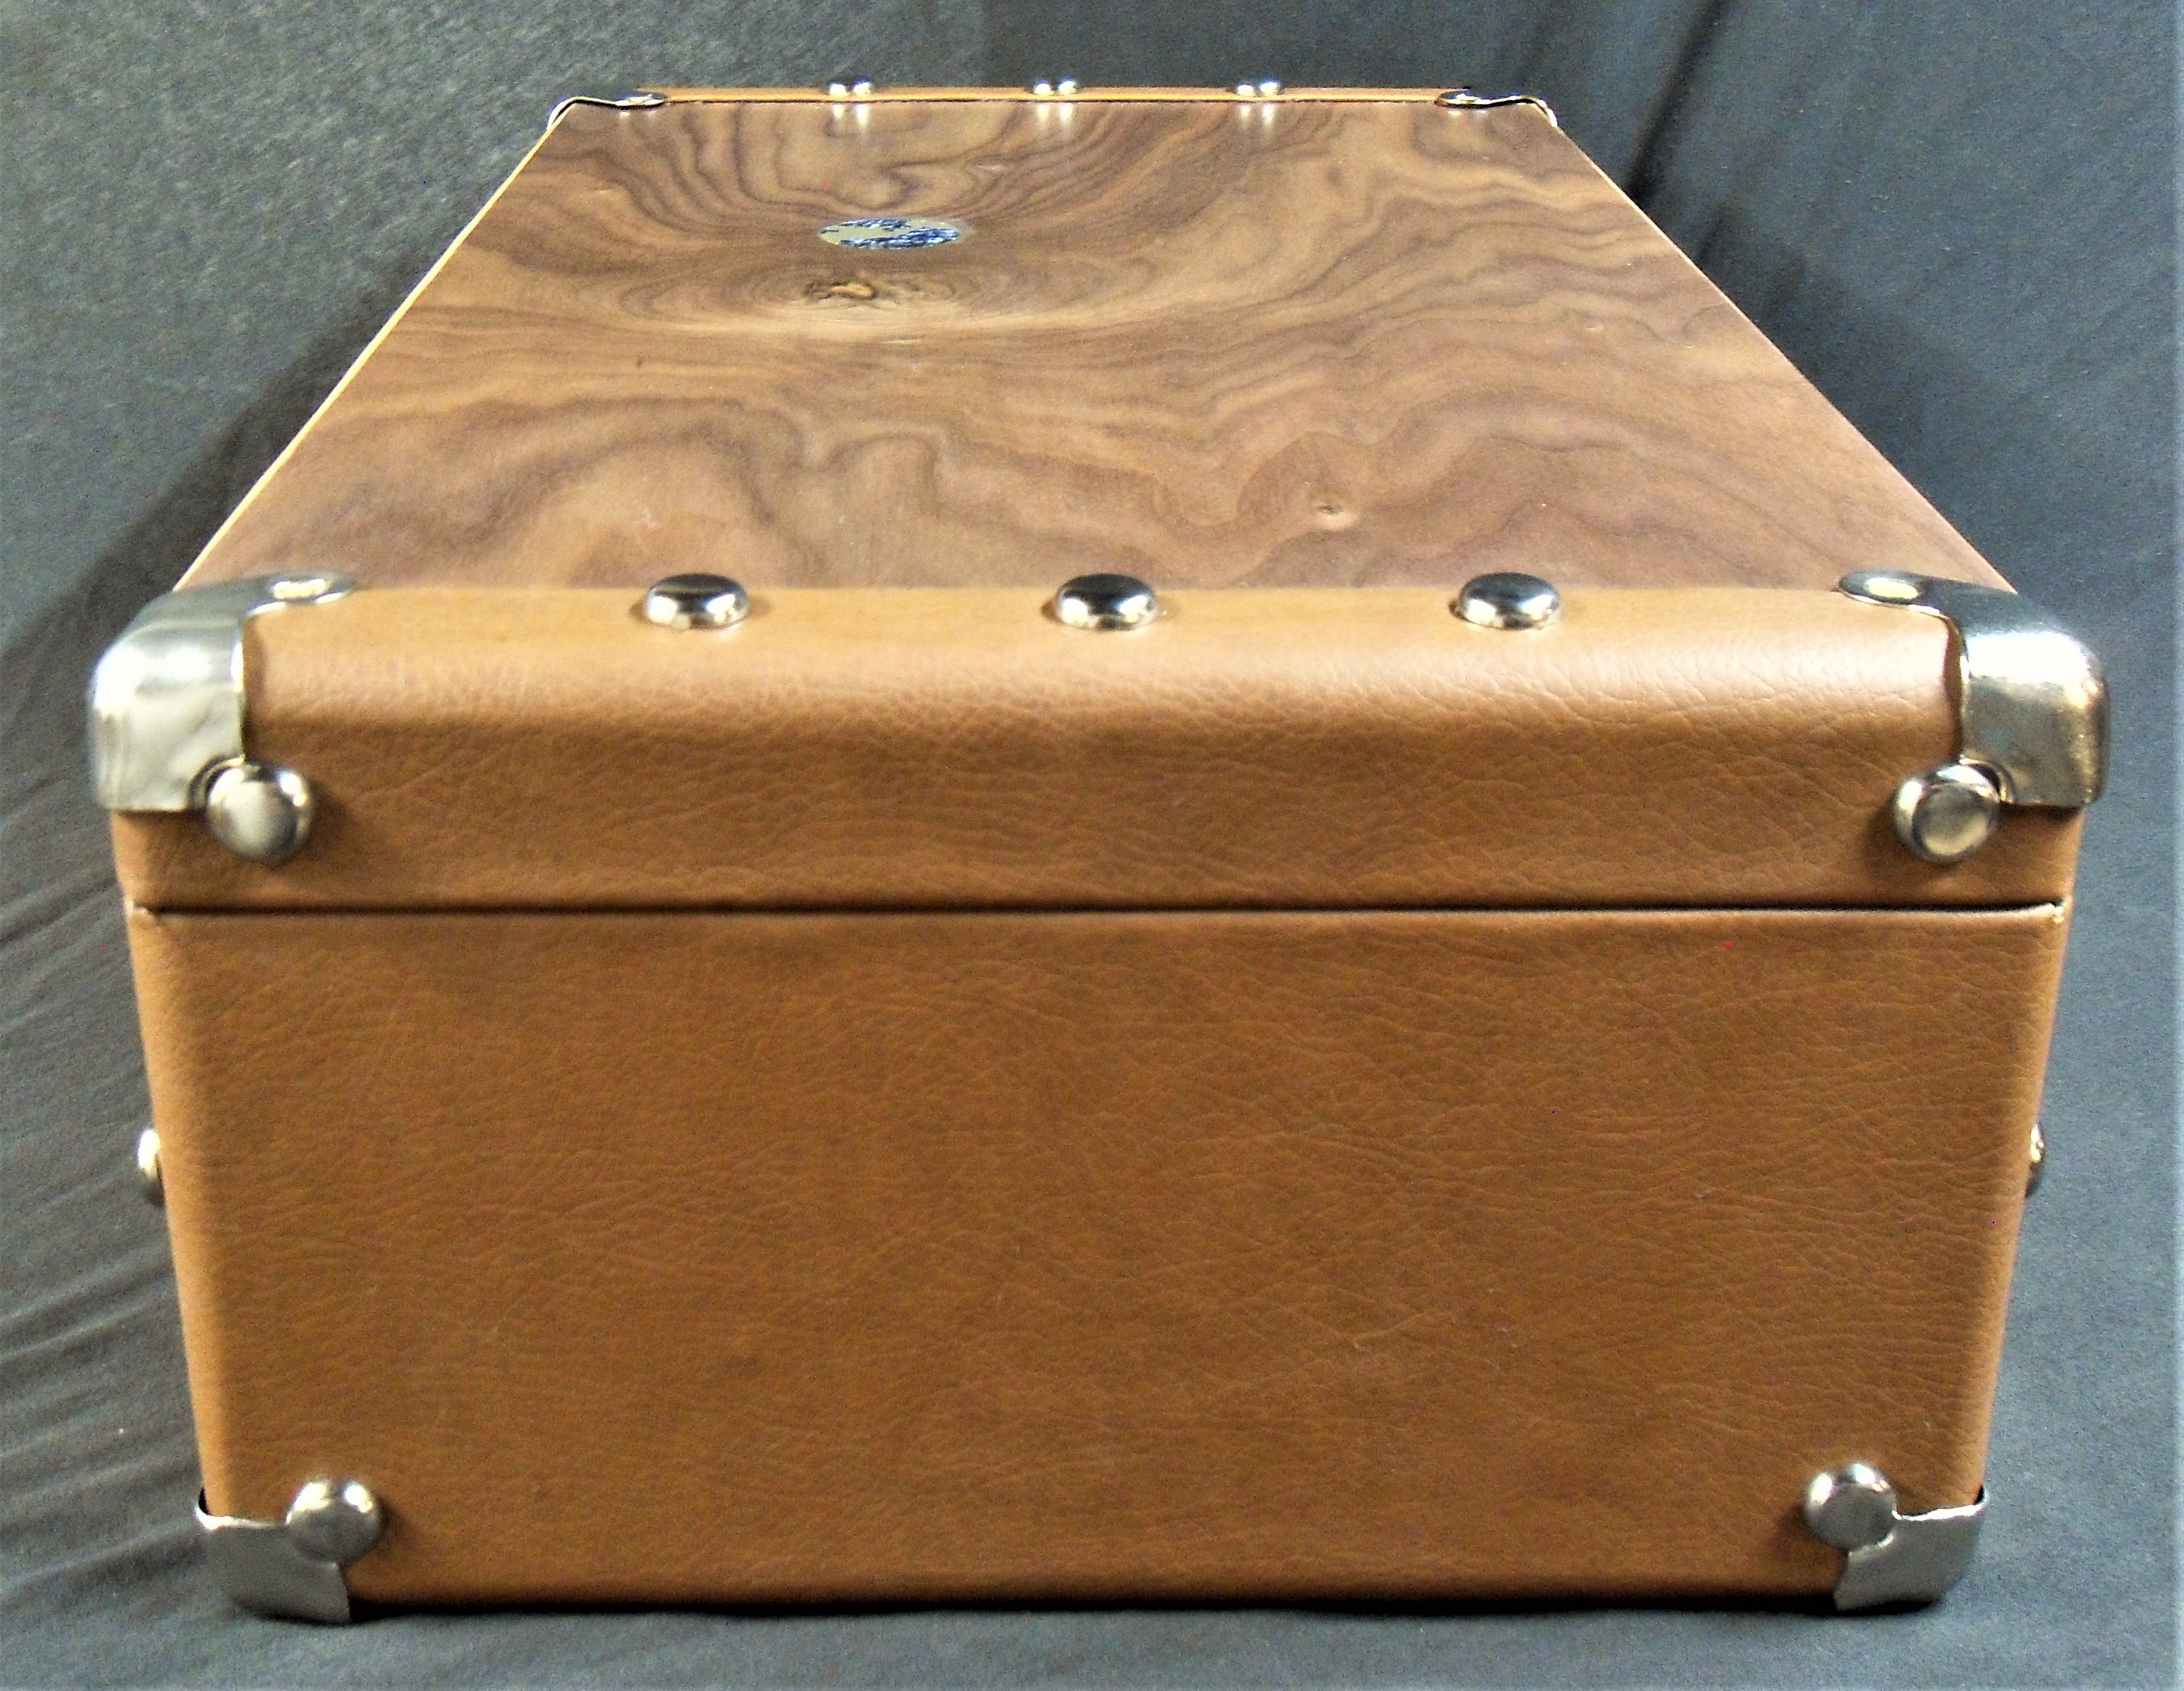
 An old high school friend asked for a custom-made case to hold three trumpets; a Bb, a C, and a D. 

The D trumpet is shorter and fits in the middle spot. There are places for six mouthpieces.

 Another requirement was for the handle on the end to be recessed since he often uses his case as a stool when performing or rehearsing. 
I decided to go one step further and give him a cushioned seat.

On the other end are just four metal studs for feet. The studs, the corners, front handle, and the tan fake leather are all things I already happened to have on hand.
 

The hinges, all of the interior velvet, foam, and plywood came from piano shop surplus.

 
 It turns out that it was good for me to not get started on this case right away. If I had, I wouldn't have had this plaque, which became the focus for the theme of the case.
This is the famous plaque from Pioneers 10 and 11, which will tell all the aliens where Earth is located and how to get here.

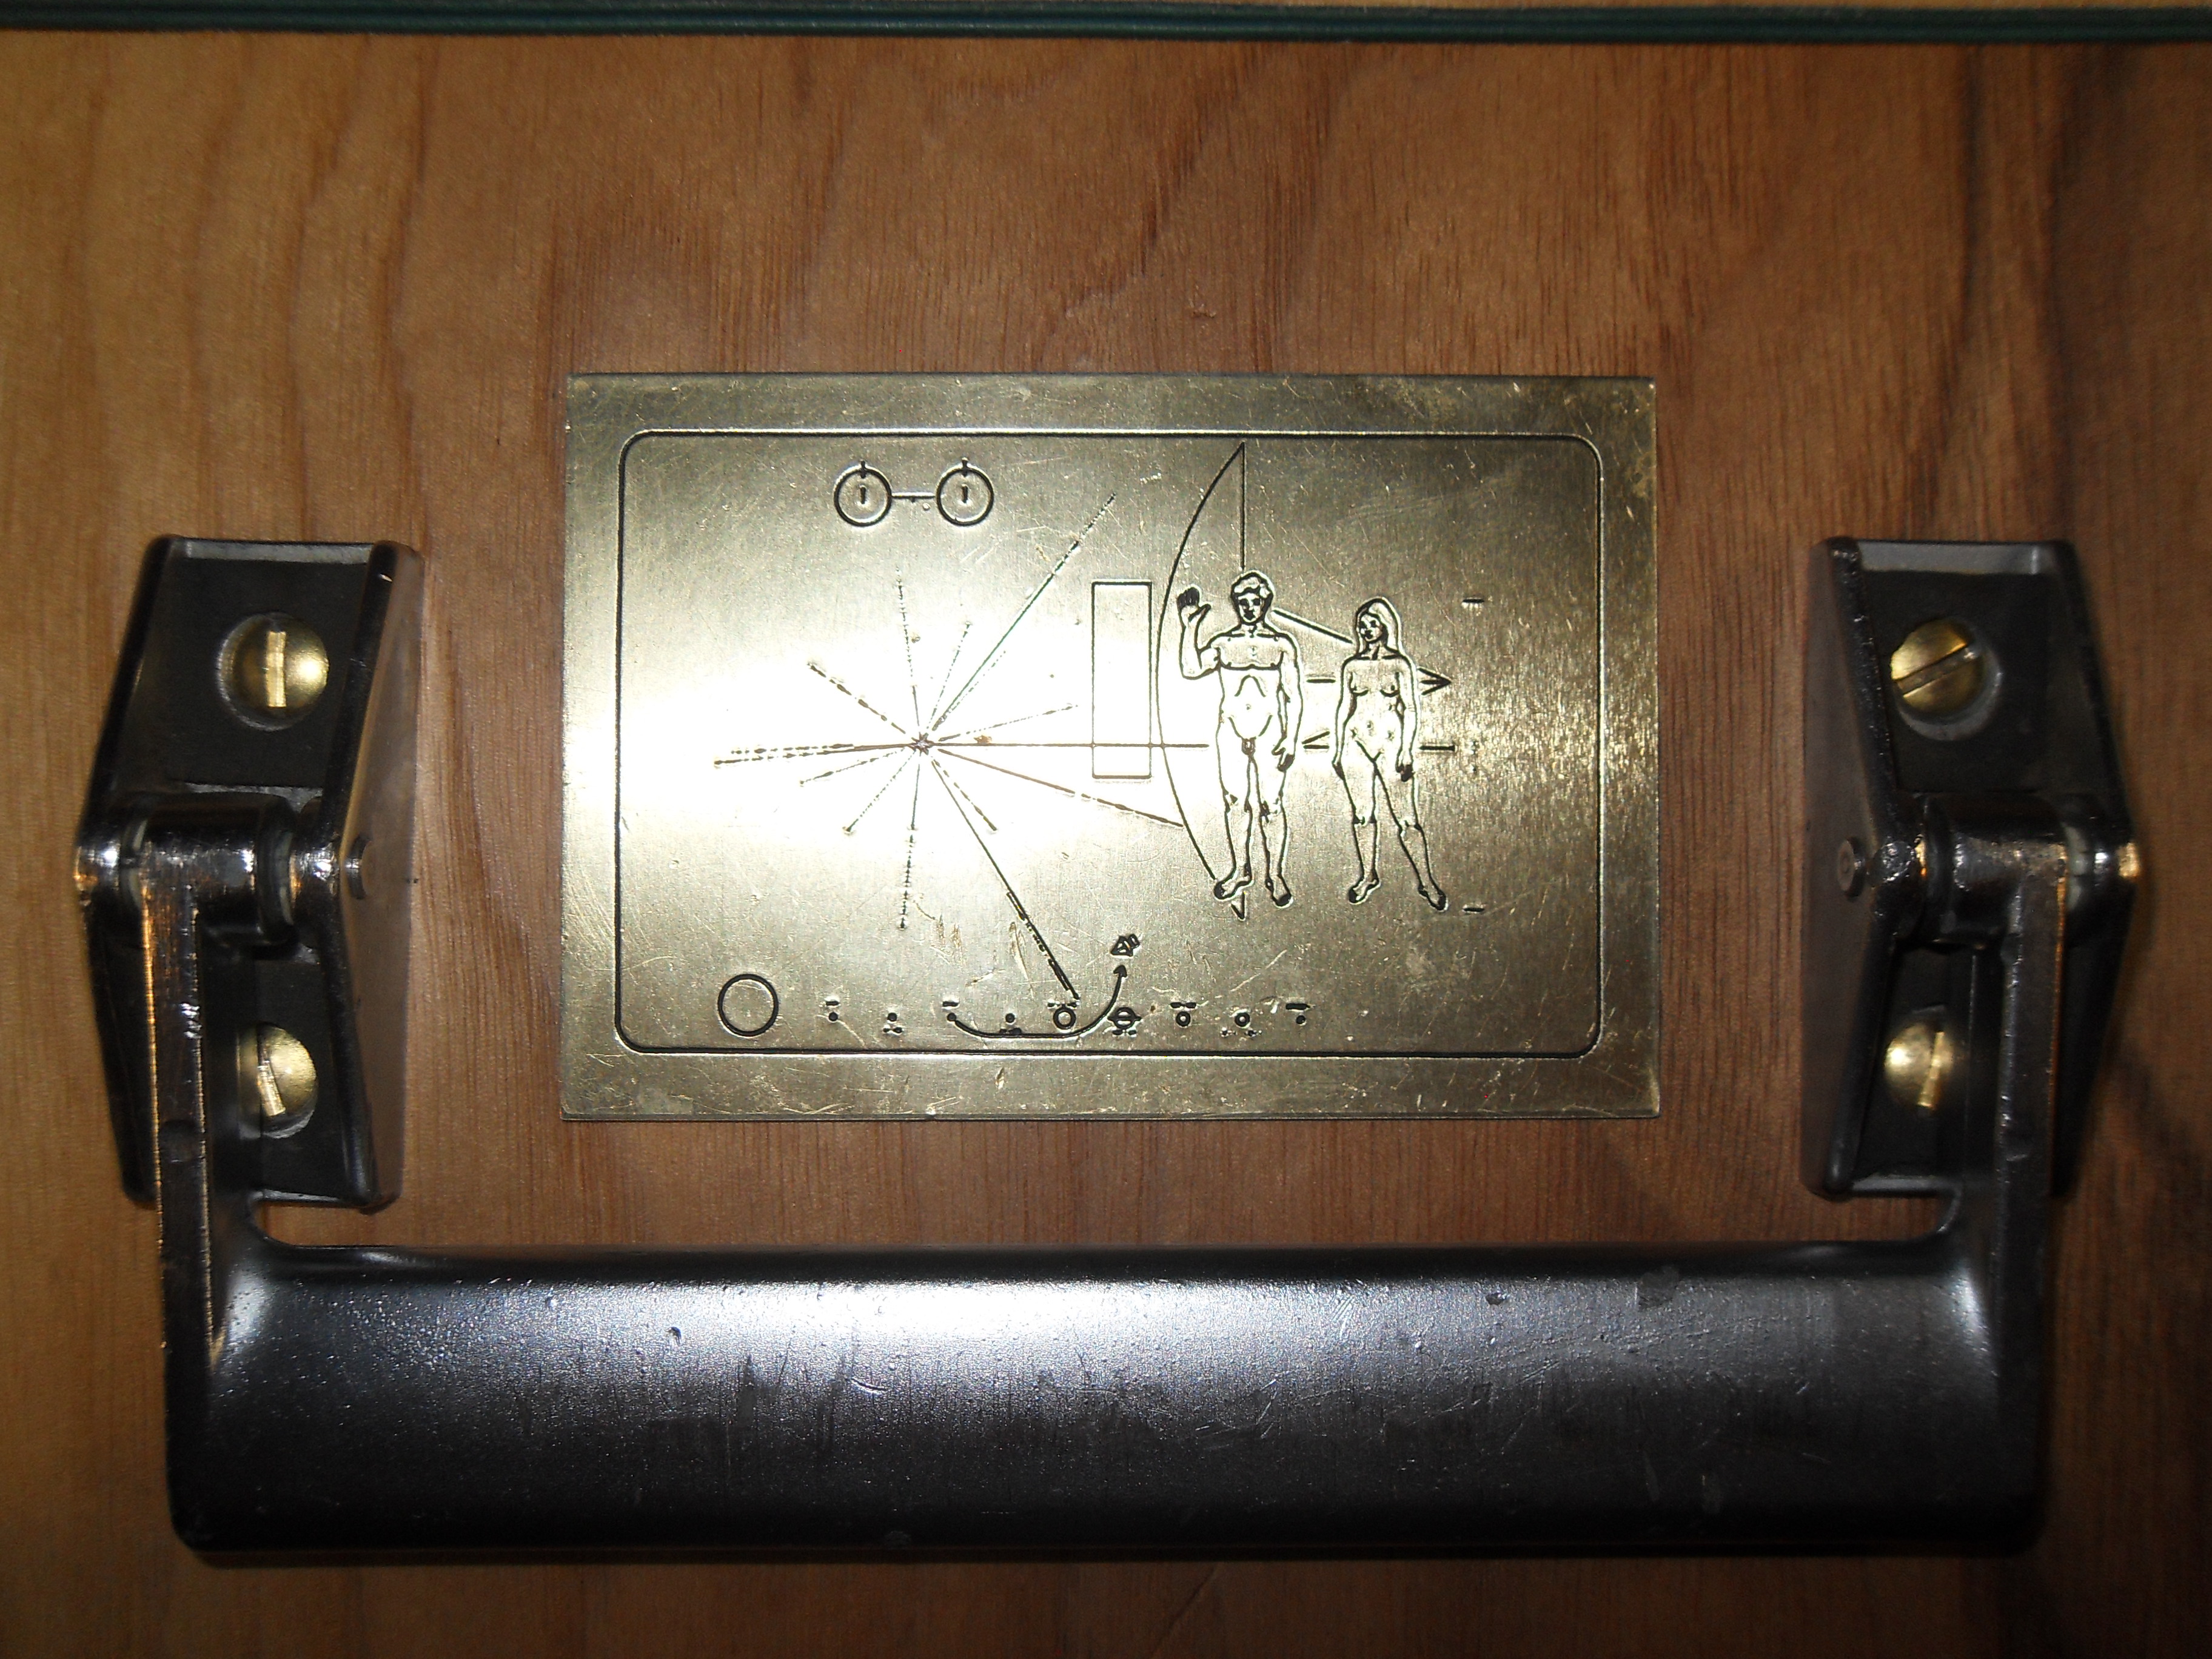
 My friend is an avid amateur astromomer. When we were in back in high school, he had the most powerful telescope in town and the our science teacher would sometimes ask to borrow it for classes. 

I also wouldn't have had these amazing walnut veneers I pulled from a dumpster if I had started working on the case right away. The top and bottom panels further enforced the space-exploration/solar-system theme. The wood-grain pattern on this side is almost perfectly shaped like Earth's magnetoshere. 
I guess the knot could represent Van Allen radiation.

On the bottom, the wood grain reminded me of Jupiter's great red spot. There happens to be a real photo of the moons Europa and Io transiting past the red spot. 
I based this panel on that photo. I ended up using some reddish stain on the "spot" to make it more obvious what it was supposed to be.
 
   Here's a close up of Europa.
And here is Io.

Here is Earth close up. My friend lives in Hawaii, so I absolutely had to make sure it was showing on the inlay. 

Finally, the Sun, made of acrylic that resembles the solar surface (somewhat.)
I will be making more posts sometime soon about stringed instruments I've built.
I'm still waiting on a recording to feature with the final post of the completed Tres Cubano......


Sunday, January 17, 2021

tres cubano build 6

 I know all four of you have been patiently awaiting the final installment of the Tres Cubano build, so here it is at last.
This is the lining and side braces for the inside of the rim. Some of the lining pieces with more closely spaced cuts are for the areas with a tighter curve, like the cutaway.
 
The side braces go in first, then the lining is glued in with clothespin clamps.
 
I keep the rim in place with turnbuckle clamps. They are out of the way from the back edge so I can glue on the back plate without the outline changing shape.
 
The back gets clamped down with bungee cords and clamps.
 
Then the body comes out of the workboard, and the turnbuckles are removed. Now the front plate gets glued on with spool clamps. I have a light running into the soundhole so I can check the fit on the inside.
 
The vertical trim pieces are glued on next.
The rubber bands are holding down a small maple patch that had chipped off while planing down the sides.
 
Channels for the binding are routed along the front and back edges.
 
The binding is made of the same maple as the sides and has to be bent to match the outline. 
Veneer strips also get layered into the binding; those don't need pre-bending.
 
The binding is glued into the channels and held in place with heavy-duty Ax-Man tape.
I use this heated iron tool to press out any small gaps in the fit.
 
Sorry, but I neglected taking pictures of fitting and attaching the neck, as well as of applying the shellac. After the finish is on, the footprint of the bridge is scraped away. Gluing a bridge over a layer of finish is a sure way to guarantee glue joint failure.
 
Here I have the bridge clamped to a jig for drilling the string holes at an angle.
 
And finally, the bridge is glued on and at this point the instrument is pretty much complete.
All that is left is wiring the pickup, stringing, and final adjustments to the set-up.
The final post of the completed Tres Cubano will be coming very soon.
 

Wednesday, December 9, 2020

tres cubano build 5

I've done quite a bit on the tres since the last post. 
First off, I finished the headstock face by gluing on a binding outline made of bent veneer strips.
I bent the veneers, like the ones I used in all of the inlays, with this soldering iron. I replaced the soldering tip with a brass tube, which stays cooler and won't burn the wood.

 The completed headcap is glued to the headstock and used as a routing guide to shape the head. The area that juts out at the back of the neck is called the volute. It still needs to be shaped here. The fingerboard is also glued on. Once the volute is shaped, the frets are hammered in, and the nut is fit, that's it for the neck.

 
 On to the body. I made a tail block which will glue to the ends of the maple sides. All the gluing surfaces are shaped to the outline of the tres. The curve in the picture on the right is way too extreme. It got flattened out a lot before gluing it to the sides.


The neck block came from the salvaged Fender and fits the neck already.
I had to angle the bottom edge of the block to match the arch of the back plate.

 I also completed the bracing on the soundboard. This is how the blocks will fit onto it.

 The two long braces run under the large center brace.
All the other "fan" braces are notched into the large brace as well.
 
Also, before the sides can get bent, the curvature of the back profile has to be cut. The side outline is marked off at 1-inch intervals, and then those points are plotted at the centerline. The depth of the sides is measured at each point on the centerline, then marked on the sides at 1-inch intervals.


With the depth marked at every inch, I just connect the dots and have the back curvature laid out on the sides. Here the sides are finally ready to bend. The missing chip right in the center will get bent separately and glued back in afterward. If I glued it in now, the heat and steam from bending would ruin the repair.


The first test bend was too thick and had a few splits. My second test bend went perfectly.

After the sides get bent I leave them clamped in place to cool and dry.

Now the clamps are off and the blocks are glued in.

I actually finished the tres about a week ago and it is now with its proud new owner.
I'll do one more build post before the final showcase.


Sunday, September 6, 2020

Tres Cubano build 4

So let me begin with a warning/advice for those starting out doing luthiery or woodwork.
Don't be like me and try to work around the mayhem of a disorganized shop.
Take a couple of months, or even a year if necessary, to set up your work space properly before starting any projects. I thought the soundboard had been set safely aside while I worked on other parts of the tres. That was until a desk lamp decided to fly off my bench and fall directly on the soundboard.
 Aside from the split, there are two deep impact craters on the surface. So even if I were able to glue the board back together without the crack line being visible, it would still have obvious damage. Luckily, I have plenty more reclaimed redwood to make a new soundboard from. Plus, I have pieces wide enough so I won't need to add extra wood to the outside edges. Those added pieces really show up in this photo and just don't look nice, so really, it will be worth doing over.
I will glue this board back together and maybe save it for a less important project. 
 
Back to the line inlay I had started on in the last post. A new tool needed to be made.
I realized the black-handled chisel I use for cleaning fret slots wouldn't work for carving out the channels because of its blade length. While going around the tighter curves, the back edge of the chisel would scrape along the sides of where I had just carved, leaving the channel too wide and rough. I ground down the tip of an old broken Dremel bit into a tiny flat-bottomed hook shape. I also whittled myself an ergonomic handle for it.

The fingerboard got narrowed a little to allow for the thickness of the new maple binding, which is getting glued on here with masking tape.
 
Once I got all the channels carved out deeply enough I inlayed veneers into them. I used a soldering iron to bend the veneer strips into the spiraly curves. Sorry, no pictures of the process, but here are the rosette, fingerboard, and headcap with the veneer inlay lines complete. I still have to inlay the dots into the drilled-out parts of the designs. 
 I'm trying to keep that part a surprise for now. 

I also cut out the truss rod channel into the new neck wood and measured how much to cut off the end of the rod. Once it's cut shorter, it will need to get re-welded at the end. I don't weld so I'll need to look around for someone who does.

I got the new and thicker back maple planed down, joined, and rough cut to the outline. Here I have just routed a slot (OK, another channel!) along the center seam. The clamped-down straight-edge was the guide for my router base to run along. The strip which will get inlayed into the slot is getting glued up into layers with all those clips.

Here's a plane shaving from the center strip to show what it looks like.
 
  Here is the center strip getting glued in on the left, and the inside reinforcement strip getting glued on the right with go-bars. I wet the maple in the right photo while cleaning off the glue squeeze-out. This shows how the maple will look with finish on it. Sort of.

The center reinforcement strip is made of redwood scrap from the soundboard. After it's glued onto the back, it gets rounded (like a speed bump) with my rounded edge plane and concave sanding block.

Next the strip gets notched where the back braces go through it, and the braces get glued on with go-bars. I used that square to keep the braces perpendicular to the strip.

 The maple for the sides has also been planed flat with no more saw marks, but it needs to be thinned more for bending. Hopefully I can get the sides bent and the new soundboard to the point that the old one was at (or further)  in not too long of a timespan. 

Bending sides (especially highly figured maple like this) is arguably the most stressful part of the process. Once that step is done, it should be pretty smooth sailing for the rest of the build.